Roof underlayment is the thin, protective layer installed between your roof deck (usually plywood or OSB) and your shingles, metal panels, or tiles. It acts as a secondary water-shedding barrier, helps manage wind-driven rain, and provides temporary protection if shingles blow off or during installation.
In short, it’s the backup plan your roof needs, especially in a rainy climate like the Puget Sound, where storms push moisture sideways and into places you don’t expect. For maximum protection, underlayment should cover the entire roof, not just select areas.
Introduction to Roofing Underlayment
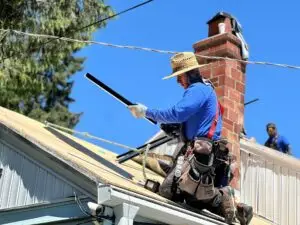
If you’ve ever watched a roof go on, you’ll notice a gray or black sheet goes down before any shingles. That’s the roof underlayment. We get asked all the time by Seattle and Bellevue homeowners, what is roof underlayment, and do we really need it? Yes. We do. Without it, your roof deck is exposed to condensation, wind-driven rain, and minor leaks that sneak under shingles.
Underlayment isn’t there to replace shingles. It’s there to back them up. Think of shingles as your raincoat and underlayment as the breathable liner underneath, it manages moisture, adds slip resistance during installation, and meshes with flashings to keep joints tight.
Different underlayment materials, such as asphalt-saturated felt, rubberized asphalt, and synthetic options, have various characteristics that affect their performance, durability, and suitability for different roofing needs.
By the way, Washington’s marine climate (Zone 4C) brings long wet seasons, gusty storms, and that sideways drizzle that somehow ignores umbrellas. Underlayment is the quiet hero in that story. We’ll keep this guide plain and friendly, but also practical. We’ll share what we recommend as professional roofers at NearMe Roofing Company, serving the Puget Sound region from Tacoma up to Everett, and out across the Eastside.
Importance of Roof Underlayment in a Roof System
Underlayment matters because roofs rarely fail all at once. They fail at the edges, at a valley, around a chimney, or during those October storms that push rain under the tabs. If water gets beneath the shingles, underlayment acts as a secondary layer of protection and is the last line of defense.
Why is it essential in the Puget Sound climate
- Wind-driven rain: The National Weather Service tracks frequent atmospheric river events in the Pacific Northwest, which can dump inches of rain in a day and come with serious gusts. Underlayment helps shed that moisture if it penetrates the top layer. Choosing underlayment with high moisture resistance is especially important in climates with frequent heavy rain.
- Condensation control: With warm indoor air meeting a cool roof deck, moisture can form on the underside of the sheathing. Proper underlayment and ventilation work together to reduce this risk.
- Temporary dry-in: If a storm rolls in mid-project (which, in Seattle, happens), underlayment keeps the deck covered until shingles go on. We’ve had to tarp at 3 p.m. with blue sky at noon, weather changes quick here.
Code and best practice
Most building codes require underlayment for steep-slope roofs. The International Residential Code (IRC) and International Building Code (IBC) lay out standard underlayment requirements for asphalt shingles, tile, and metal. You can find general guidance through the ICC and local amendments via the City of Seattle as needed:
- IRC/IBC overview: https://codes.iccsafe.org/
- City of Seattle SDCI: https://www.seattle.gov/sdci
We also lean on guidance from the National Roofing Contractors Association (NRCA) and manufacturers. When codes, climate, and manufacturer instructions all line up, your roof lasts longer. It’s essential to follow manufacturer’s recommendations for underlayment installation to ensure compliance and optimal performance.
One more thing no one loves to say out loud
Underlayment can reduce damage when a few shingles inevitably lift or break. It’s peace of mind. And in insurance claims, having the right underlayment sometimes makes the difference between a patch and decking replacement.
Proper underlayment installation is also often required by roofing manufacturers to qualify for warranty coverage.
Types of Underlayment
There are three basic types of underlayment most homeowners will see.
1) Asphalt-saturated felt (felt paper)
Felt underlayment (also known as felt paper) is the classic choice. Often called 15-pound or 30-pound felt, though modern weights vary, it’s a cellulose or fiberglass mat saturated with asphalt. Felt underlayment can absorb moisture over time, which may lead to deterioration. It is affordable, familiar, and works fine in many conditions, but it wrinkles when wet, which can prevent shingles from lying flat and affect the finished appearance. It also tears more easily in high winds.
2) Synthetic underlayment
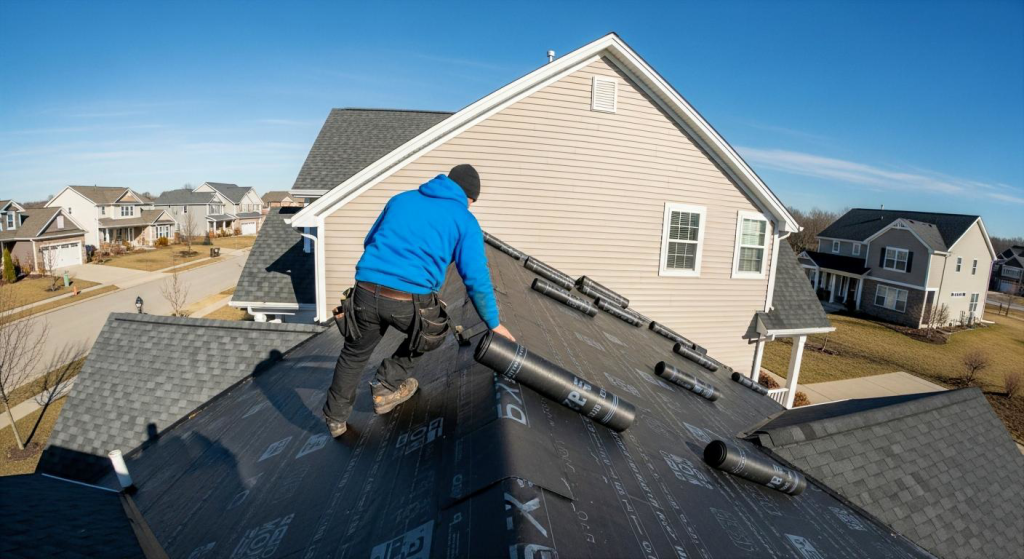
Many modern synthetic underlayments are woven or spun-bond polypropylene sheets with a polymer film bonded to one or both surfaces, making them lighter, stronger, and far more tear-resistant than traditional felt. They tend to lie flatter and provide better walkability.
Many synthetics have high UV resistance for longer exposure windows during installation. However, some synthetic underlayments are non-permeable, which can lead to trapped moisture beneath the roofing system if not properly ventilated.
3) Self-adhered (ice-and-water) underlayment
A self-adhering, rubberized asphalt underlayment is a high-performance roofing product with a peel-and-stick backing. These membranes are self-sealing, meaning they seal around fasteners to prevent leaks.
Sometimes called a ‘peel off membrane’ due to their peel-and-stick installation method, they are designed for leak-prone areas, valleys, eaves, rakes, low-slope transitions, skylights, chimneys, and roof-to-wall intersections. In heavy snow regions, this self-adhering underlayment is used along eaves against ice dams; in Puget Sound, we use it mainly for wind-driven rain protection and critical details.
Synthetic Roofing Underlayment Benefits
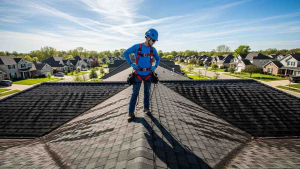
We do a lot of roofs in Seattle, Bellevue, Redmond, and up the I-5 corridor, and frankly, synthetics have become our go-to for steep-slope asphalt shingle systems.
Durability and walkability
Synthetic rolls are tough. They resist tearing when installers move around or when gusts catch a corner. Good products have textured surfaces that provide non-skid properties, improving safety for installers—especially on damp mornings when the marine layer hasn’t burned off yet.
Moisture performance
Quality synthetics are designed to shed water and resist water absorption, so they don’t wrinkle like felt when they get wet. This keeps shingle courses straighter. And that translates to a cleaner look and better seal. By resisting water absorption, synthetic underlayments help prevent moisture intrusion into the roof deck.
Lighter weight, bigger coverage
A single roll of synthetic can cover more square footage than a felt roll and weigh less. That means fewer trips up the ladder, faster install, and honestly, fewer sore backs by the end of the day.
UV exposure window
Manufacturers often rate synthetics for longer UV exposure, sometimes 60 to 180 days. We don’t like to push it, but in real life, Seattle rain delays happen. Synthetic underlayments can be left exposed to sunlight and weather for much longer periods than traditional felt without degrading, making them more reliable if the roof must be left exposed during construction delays. Having that buffer keeps a project on track without panic. Always check the specific product’s data sheet.
Fire and code considerations
Many synthetics meet ASTM standards and have appropriate fire classifications when installed with approved roofing. If you’re chasing discounts or meeting specific HOA requirements, ask us to confirm the rating.
Self Adhered Underlayment Installation
We call it ice-and-water shield out of habit, even though ice dams aren’t the main problem west of the Cascades. Wind-driven rain and complex details are. Self-adhered membranes are our belt-and-suspenders layer at those points. These self-adhering membranes offer the best protection in areas prone to leaks and severe weather.
Where we install it
- Valleys: Always. Valleys see higher water volume and turbulence. A self-adhered layer under a metal valley or woven shingles is standard.
- Eaves and rakes: In exposed locations (west-facing or on hilltops), we add a strip to resist uplift and backflow.
- Roof penetrations and transitions: Around skylights, chimneys, and plumbing vents, as well as where roofs meet walls. It ties into step flashing and counterflashing.
How we install it (the short version)
- Clean, dry deck: Dust or frost can ruin adhesion. Yes, frosty mornings happen even in Tacoma.
- Prime if required: Some products recommend primers on OSB or in cold temps.
- Lap rules: Follow the manufacturer for side and end laps (often 3–6 inches). Roll with a pressure roller to seat adhesive.
- Sequence: Always install from the low point upward. Tie into flashings. Don’t trap water behind a membrane.
Nail sealing advantage
Self-adhered products seal around fasteners better than mechanically attached underlayment. These products have rubber-like qualities, allowing them to self-heal around fasteners and minor damage. It’s not a cure-all, but it’s a serious upgrade in leak-prone zones.
Role of Underlayment in Synthetic Roofing
This phrase trips people up. We’re not talking about synthetic shingles, though those exist. We mean the role underlayment plays when it is installed beneath the primary roof covering material, such as shingles or metal panels.
Asphalt shingle systems
Underlayment provides:
- A second layer of water protection under the shingle field
- A smooth substrate for shingle adhesion and alignment
- Integration with drip edge, starter strip, and flashing
We’ve noticed synthetic underlayment reduces buckling and telegraphing under asphalt shingles versus felt, especially after a few wet-dry cycles during install.
Metal roofing
Metal is great in the Puget Sound for longevity. Underlayment for metal roofs should be able to resist heat to prevent degradation in high-temperature situations. But it’s unforgiving about condensation. Underlayment needs to be high-temp rated if a dark metal roof is installed over a heated space. Some assemblies include a slip-sheet or a vented underlayment to control thermal movement and reduce noise. If you live near the Sound where fog is common, that extra moisture control helps.
Low-slope transitions
Where a steeper roof meets a low-slope section (say, over a porch), standard underlayment might not cut it. We shift to self-adhered membranes and sometimes a modified bitumen cap, such as polymer modified bitumen, in that zone. Earlier we said underlayment is a backup plan, at low slope, it becomes the main plan unless you change materials.
Felt Paper Underlayment Characteristics
Felt underlayment is generally referred to as asphalt-saturated felt or felt paper in the roofing industry.
We still install felt on certain projects. It has a place.
Pros
- Cost-effective: For budget-sensitive jobs or outbuildings, felt can be the right call.
- Tradition and compatibility: Some tile or cedar shake specifications still reference felt. We follow the spec if the system was engineered that way. Felt underlayment is also one of the most common asphaltic roofing materials used in traditional roofing systems.
Cons in our region
- Wrinkling when wet: Leads to cosmetically uneven shingle courses and can create pockets where moisture lingers.
- Tear resistance: Wind and foot traffic can rip it, which is not ideal on a breezy day along the waterfront in Edmonds or Des Moines.
- Limited exposure: Felt degrades faster in UV, so delays are risky.
- Weather resistant qualities: Felt underlayment has limited weather resistant qualities compared to modern synthetic options, making it less effective at protecting against moisture, UV exposure, and wind-driven rain.
A small nuance
Heavier felt (so-called “30-pound”) behaves better than lighter grades. But modern synthetics often outperform both in tear strength and stability.
Choosing the Right Underlayment for Your Roof
The right underlayment depends on the roofing type, local climate, and your specific priorities as a homeowner. We like to match underlayment to the roof style, the microclimate, and your priorities (budget, longevity, warranty).
Climate and site
- Puget Sound rain: On open exposures in West Seattle, Alki, or the Sammamish Plateau, we prefer synthetic + self-adhered in valleys and eaves. Underlayment is especially important for protecting the roof during periods of wet weather common in the Puget Sound region.
- Snow and ice: Up near Snoqualmie Pass or for cabins toward Leavenworth, eave protection with self-adhered membranes is critical due to ice dam potential.
- Coastal wind: On the Kitsap side and Whidbey, uplift is real. Higher fastener density and robust synthetic underlayments help.
Roof covering
- Asphalt shingles: The choice of underlayment depends on the roofing material being installed. For shingles, a quality synthetic underlayment plus self-adhered at details is our baseline.
- Metal: For this roofing material, we use high-temp synthetic underlayment, sometimes with a slip layer. We also watch for noise and condensation control.
- Tile or shakes: The roofing material here requires following the manufacturer’s guidelines—often heavier felts or specific underlayments are required.
Warranty and manufacturer alignment
Most shingle manufacturers have system warranties that require specific underlayment types. We align with those. If you want an extended warranty from a major brand, we’ll design the underlayment package to match.
Budget and ROI
Felt might save a little upfront. Advanced synthetic and self-adhered underlayments may have a higher cost, but they offer greater long-term value. But when storms hit (and they do), repairing a stained ceiling or damaged sheathing costs more than the delta to upgrade to synthetic plus self-adhered at critical areas.
Energy costs are high lately, and while underlayment isn’t insulation, a tighter roof assembly helps manage indoor humidity and can indirectly protect attic insulation. If you’re unsure, ask us for two options, baseline and storm-hardened, and we’ll walk through the pros/cons for your exact home.
Installation Best Practices for Roof Underlayment
We’ve learned a few habits over hundreds of Puget Sound installs. Some are small, but they add up to a drier, tougher roof. Attention to detail in underlayment installation is essential for the durability and performance of the entire roof system.
1) Start with a sound deck
- Replace soft or delaminated roof sheathing or plywood before installing underlayment. Underlayment can’t fix rotten wood.
- Verify fastener pull-through strength, especially in older homes in Ballard or Tacoma’s North End.
2) Deck prep and layout
- Sweep and blow off dust and debris. Little things under the underlayment cause bumps under shingles.
- Install drip edge at eaves first (per many codes and manufacturers), then run underlayment over the roof edge metal at the eaves for proper waterproofing. Next, install rake metal over the underlayment at gables. This layering at the roof edge manages water flow.
3) Laps, alignment, and fastening
- Follow printed lap lines: side laps often 4 inches, end laps 6 inches for synthetics, check the data sheet.
- Use capped nails or plastic cap staples as required. They hold better and reduce tearing.
- Keep fasteners flush, not overdriven. Angle fasteners are trouble when wind hits.
- Always check the perm rating of underlayment materials to ensure proper moisture control and help maintain roof durability.
4) Integrate self-adhered membranes smartly
- Self-adhered membranes are used to form valleys, providing extra protection in these high-risk areas. Then field underlayment laps over the edge of the valley membrane, never the other way.
- Around skylights and chimneys, run self-adhered up the sides, then step flashing, then counterflashing. It’s a dance, but the order matters.
5) Ventilation and moisture control
- Underlayment is not a substitute for attic ventilation. Make sure intake (soffit) and exhaust (ridge) ventilation meet code and manufacturer specs.
- Check bath fan terminations. We still see them dumping warm, damp air into attics. That moisture ends up under your deck.
- In some cases, using a vapor-permeable underlayment can help manage moisture and prevent condensation buildup by allowing vapor to escape while blocking liquid water.
6) Exposure limits and scheduling
Respect UV exposure ratings. Seattle projects get weather delays, fine. The weather surface of the underlayment must be durable enough to withstand temporary exposure to sun and rain. Just don’t push the limits so far the underlayment degrades before shingles land.
7) Document for warranty
- We photograph layers as we go. It’s boring, yes, but if there’s a manufacturer warranty claim later, documentation makes life easier.
A quick local note
As the rainy season approaches in Seattle (usually October to April, give or take), scheduling matters. We often stage materials, dry-in quickly with synthetic, then return between showers to set shingles. It’s a rhythm we’ve adapted to after many years, and it keeps homes dry.
If you’re exploring a project anywhere across the Puget Sound, Seattle, Bellevue, Kirkland, Renton, Redmond, Tacoma, Everett, our roofers at NearMe Roofing Company can assess your roof and recommend the right underlayment system for your home and budget.
Earlier, we talked about underlayment as a backup. That’s still true. But when installed with care, correct laps, integrated flashings, and clean decks, it becomes more than a backup. It’s part of a resilient roofing system that’s built for our moody weather.
Roof Underlayment FAQs
What is roof underlayment and why do I need it?
Roof underlayment is the thin protective layer between the roof deck and shingles, metal, or tile. It protects the roof deck and home from water intrusion and weather damage by acting as a secondary water-shedding barrier, controlling wind-driven rain, adding temporary dry-in during installation, and integrating with flashings. In wet, gusty climates, it’s the last line of defense when water gets past the top layer.
What types of roof underlayment are there, and which is best for rainy climates?
Underlayment is installed beneath various roofing materials, including asphalt shingles, metal, and tile, to provide water resistance and secondary protection. Common types include asphalt-saturated felt, synthetic underlayment, and self-adhered (ice-and-water) membranes. In rainy, windy regions, quality synthetics are preferred for tear resistance, walkability, flatter lay, and UV tolerance. Self-adhered membranes are added at valleys, eaves, rakes, and penetrations to guard leak-prone areas against wind-driven rain.
Where should self-adhered (ice-and-water) underlayment be installed?
Install self-adhered underlayment at valleys, eaves, and rakes in exposed locations, and around other penetrations such as vents, skylights, chimneys, plumbing vents, and roof-to-wall intersections. Follow the manufacturer’s lap rules, prime if required, roll for adhesion, and always tie into step and counterflashing to avoid trapping water.
How do you install roof underlayment correctly?
Start with a clean, solid deck. Install drip edge at eaves, then run underlayment beneath roofing materials for optimal protection, and install rake metal over the underlayment. Follow printed lap lines, use cap fasteners, and keep them flush. Integrate self-adhered at valleys and details. Maintain attic ventilation and respect UV exposure limits per the product data sheet.
How long does roof underlayment last, and how long can it be exposed to sunlight?
Underlayment typically lasts the life of the roof when covered promptly and installed per specs. Exposure windows vary: many synthetics are rated about 60–180 days; felt degrades much faster and can wrinkle when wet. Self-adhered products should be covered as soon as practical. Always follow the specific manufacturer’s ratings. To ensure its effectiveness and longevity, underlayment should be protected from prolonged exposure to harsh weather, especially the upper surface.
What is roof underlayment likely to cost, and is synthetic worth it?
Material costs vary: felt roughly $0.05–$0.15 per sq. ft., synthetic $0.10–$0.25, and self-adhered $0.50–$1.00+. Installed costs are higher and depend on complexity. Synthetics often pay off with fewer tears, flatter courses, longer exposure tolerance, and reduced callbacks, while self-adhered at details lowers leak risk in storms. When budgeting, be sure to consider the cost of underlayment alongside other materials used in the roofing system.