Roof ventilation is the controlled movement of air through your attic or roof assembly so fresh air comes in (intake) and warm air, moist, or stale air goes out (exhaust). Done right, proper roof ventilation helps prevent mold, protects shingles, stabilizes indoor temperatures, and can lower energy costs.
In Washington’s wet-and-warm-then-cold climate, we use balanced intake vents and exhaust vents, usually soffit vents plus ridge vents, to keep the attic space dry and the roof system healthy. Roof ventilation systems ensure proper attic ventilation by allowing cool air to enter and hot air to exit through various roof vents like ridge vents, box vents, gable vents, and turbine vents.
The Basics: How Roof Ventilation Works
Attic airflow in simple terms
When we talk roof ventilation, we’re really talking about airflow. Cool air, drier outside air enters low on the roof (usually under the eaves), then warmer and more humid air exits high on the roof (near the ridge). Hot air rises, stack effect, so we use that to our advantage. In a typical attic, that gentle upward movement keeps moisture from lingering and heat from building up like a closed car on a July afternoon.
In our roofing projects around Seattle and Bellevue, we see this every week. Homes with steady intake and clean exhaust feel… calmer, if that makes sense. The attic sheathing stays dry, nails don’t rust as fast, and you don’t get that musty “basement smell” wafting down. By the way, airflow doesn’t need to roar. Slow and steady is often the sweet spot.
Intake and exhaust: Why balance matters
Intake vents without exhaust vents just trap air. Exhaust vents without intake vents starve the system and can even pull conditioned air from your house, which isn’t ideal. So we balance both sides. As a rule of thumb, we aim for roughly a 50/50 split of net free area (NFVA) between intake vents and exhaust vents. That balance helps the attic space “breathe” evenly across the entire roof, not only in one hot corner.
We’ve noticed that under-intake is more common than over-exhaust. Soffit vents get painted shut, clogged by insulation, or blocked by bird nests, true story from a Kirkland project last fall. We added baffles and opened the soffits, and the attic temperature dropped about 12°F on a sunny day.
Ventilation versus insulation and air sealing
Ventilation is not a substitute for insulation or air sealing. Different tools: different jobs. Insulation reduces heat transfer (think R-value), air sealing reduces air leaks from the living space, and ventilation moves incidental moisture and excess heat out of the attic space. We want all three working together.
Poor air sealing lets bathroom steam and house humidity drift into the attic. Then ventilation has to work overtime. Good practice is: seal ceiling penetrations (light cans, chases), add proper insulation, and then ventilate.
Why It Matters in Washington’s Climate
Rain and moisture management
We live with rain. A lot of it on the west side. Seattle averages 37–38 inches of precipitation annually, with long damp seasons that push moisture into every nook. NOAA’s climate data backs that up and you can feel it in October when the first long fronts park over the Sound.
Roofs in our region must shed water outdoors and release moisture indoors. Roof ventilation helps dry the attic after humid days and minimizes condensation on the underside of the roof deck. Without it, we see mold blooms on sheathing, rusty fasteners, and soggy insulation. Not dramatic overnight, but a slow, costly creep. Proper ventilation prevents poor indoor air quality by expelling stale air.
Summer heat and smoke events
Summers have been getting warmer in Washington, and wildfire smoke is, sadly, more common. On hot days, roof ventilation moves heat out, which eases the load on your AC or heat pump. That said, during heavy smoke events, some homeowners prefer to temporarily reduce makeup air from outside to keep particulates down indoors. We get that, air quality and health come first. Proper filtration and a strategy for those few weeks a year can coexist with year-round roof ventilation. Roof ventilation systems help maintain energy efficiency by allowing hot air to escape.
Snow, ice, and cold snaps on the east side
Cross the lake or the mountains and conditions change. Snoqualmie, Issaquah Highlands, Sammamish, up to Wenatchee, cold snaps happen, and snow can linger. In these places, attic ventilation plus correct insulation and air sealing help reduce ice dams by keeping the roof deck temperature more uniform. Ice dams form when heat escapes unevenly, melts snow, and refreezes at the eaves. With steady airflow, the roof surface stays closer to outdoor temps, which helps a lot, even if we can’t control every microclimate on a complex roof. Proper ventilation can prevent ice dams in cold climates.
Common Vent Types and Where They Go
Soffit vents (intake)
Soffit vents sit under the eaves and feed cooler air outside air into the attic. Continuous strip vents look clean, while rectangular or circular vents are easy retrofits. The key is keeping the air path open into the attic space, rafter baffles (sometimes called chutes) prevent insulation from blocking airflow at the roof edge. We see many homes in Bellevue where the soffit vents exist but the fiberglass was stuffed tight. A quick fix, big payoff. Soffit vents are essential intake vents for roof ventilation systems.
Ridge vents (exhaust)
A ridge vent runs along the roof’s ridge or roof’s peak. Ridge vents are discreet, effective, and distribute exhaust evenly. With proper intake, ridge vents produce smooth airflow and reduce hot spots. We like ridge vents on most pitched roofs in the Puget Sound area.
Make sure the ridge vents include an external baffle and weather filter, which helps with wind-driven rain and drifting pine needles. Ridge vents are a popular choice for exhaust ventilation in roof ventilation systems. Ridge vents allow hot air to exit, promoting continuous airflow and air movement. Ridge vents can be paired with shingle over vent for aesthetic appeal. Ridge vents help in temperature regulation by allowing air to flow from intake vents to exhaust vents.
Ridge vents, as part of roof vent systems, are installed along the ridge line. Ridge vents ensure the roof ventilation system functions properly. We recommend ridge vents for their ability to expel air and allow cool air enters through soffit vents. Ridge vents can improve the roof’s lifespan and roof’s longevity by preventing wood rot and poor ventilation issues. Ridge vents are suitable for various types of roof, including those with ridge cap shingles.
Gable vents and roof louvers
Gable vents (those triangles on the house ends) can help, particularly on older homes. Roof louvers, sometimes called box vents, are individual exhaust points installed near the roof ridge. Box vents work, though they localize exhaust. If we mix gable vents with ridge vents, we plan the system to avoid short-circuiting (air rushing from gable vent to ridge vent without washing the lower attic space). It’s not that mixing is forbidden, but we choose a primary strategy so airflow travels the full attic height.
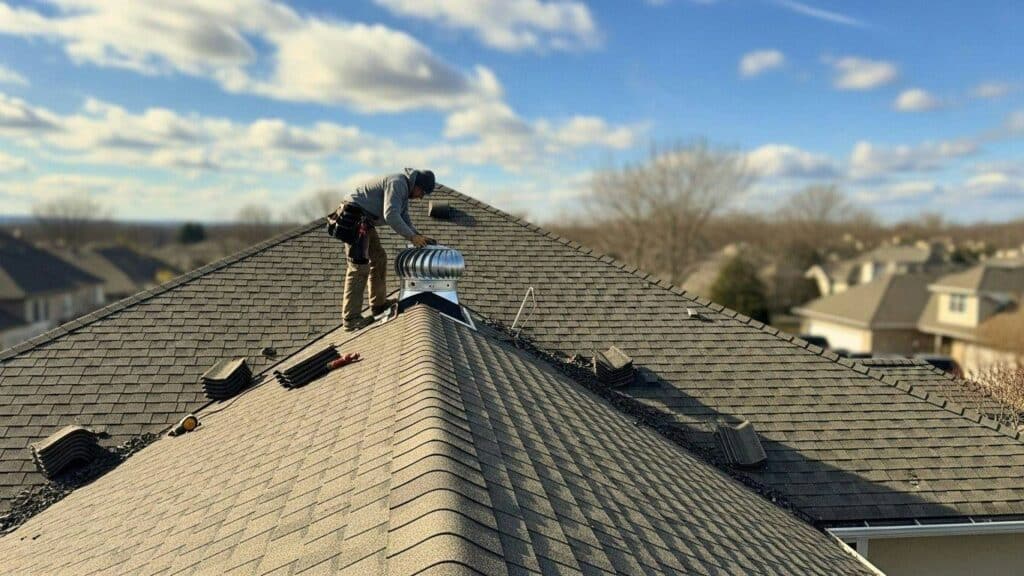
Powered and solar fans: when to use or avoid
Powered vents or power vents can pull a lot of air. That’s a double-edged sword. If there’s not enough air intake, a power vent may depressurize the attic and draw conditioned air from the house, or worse, backdraft a gas water heater or furnace. We’re careful here. In some cases (complex roofs, minimal ridge length, or very low-slope areas), a solar fan can be helpful, but we design around adequate intake vents, sealed ceiling penetrations, and carbon monoxide safety. Powered vents include power vent options like wind turbines or turbine vents.
Ventilation for Different Roofs and Attics
Standard attics
This is the classic setup: soffit vents intake, ridge vents exhaust, baffles at every rafter bay, air sealing at the ceiling plane, and code-level insulation on the attic floor. It’s cost-effective and reliable. We like to pop our heads in the attic afterward and see daylight along the ridge line and soffit vents (tiny slivers through vent screens), a small gut-check that the path is open. This setup ensures proper ventilation in the attic ventilation system.
Cathedral or vaulted ceilings
No open attic? We still need a vent channel above the insulation. Typically, we create a continuous 1–2 inch air space from soffit vents to ridge vents with baffles between rafters, then dense-pack or foam under that channel. Detailing around skylights and chimneys is fussy work. Most professionals agree that vented vaulted assemblies behave better over time here than trying to make a perfect unvented assembly in our wet climate, unless we’re using properly detailed spray foam per code. It has to be right, no shortcuts. This maintains the roof ventilation in vaulted designs.
Low-slope or flat roofs
Flat roofs are their own world. Some are vented with perimeter intake vents and high-point exhaust vents, but many low-slope systems in our area are designed as unvented “compact roofs” using rigid insulation above the roof deck or closed-cell foam below. In these cases, dew point control, vapor barrier placement, and continuous insulation become the main act. When we go this route, we follow the International Residential Code (IRC) Section R806 for unvented roof assemblies and the manufacturer’s specs, no guessing. Low-slope roofs may use drip edge vents or drip edge vent for intake ventilation.
Signs Your Roof May Not Be Breathing Well
Condensation, musty smells, or mold
If you pop into the attic on a cold morning and see water droplets on nails or sheathing, that’s condensation. Musty odors or dark spotting on the underside of the roof decking deserves attention. We’ve crawled attics in Shoreline where a simple bath fan misrouting pumped steam inside for years, ventilation was trying, but it couldn’t keep up. Poor ventilation can lead to wood rot and reduced roof lifespan.
Hot upstairs rooms or high energy bills
Attics that trap heat will cook the rooms under them. If the second floor in August feels 10 degrees warmer than downstairs, and your AC runs longer than you remember, airflow might be part of the fix. According to the U.S. Department of Energy, improving attic insulation and sealing can cut heating and cooling costs significantly. This improves energy efficiency and reduces energy bills.
Curling shingles, rusty nails, or frost in the attic
Shingles that age prematurely, curling, brittle edges, can hint at trapped heat. In winter, we sometimes see frost crystals on the sheathing in Bothell attics. That’s beautiful for about three seconds, then you realize it melts midday and rains on your insulation. Not ideal. Roof shingles and roofing material need proper ventilation to last their roof’s lifespan.
Pests or dust on insulation near vents
Birds, wasps, and rodents love cozy soffits. Also, look for dark dust trails on insulation directly under vents, sometimes it’s just air movement marking the path, sometimes it’s a sign baffles are missing and insulation is shifting into the airway. We clean, screen, and retrain the airflow so critters stay out and the vents stay clear. This prevents issues in the ventilation system.
Sizing and Codes Made Simple
The “1-in-300” rule of thumb explained
You’ll hear roofers mention the 1:300 rule. It means: provide 1 square foot of net free area (NFVA) for every 300 square feet of attic floor area or attic floor space, assuming a proper Class I or II vapor retarder on the warm-in-winter side. Without that interior vapor retarder, the IRC default is 1:150.
We calculate NFVA using the vent manufacturer’s published numbers, not just hole size. Screens and louvers reduce free area, so labels matter. One square foot per certain area ensures adequate ventilation.
Balanced intake-to-exhaust ratios
Within the total NFVA, we aim for roughly half intake and half exhaust. If we have to cheat, we slightly favor intake (e.g., 55% intake, 45% exhaust) to reduce the risk of depressurizing the attic. Spreading intake evenly along the eaves helps eliminate dead zones in the corners. This balance is crucial for the ventilation system.
Local code notes and best practices in Washington
Washington follows the IRC with state amendments and the Washington State Energy Code (Residential). Attic ventilation remains required unless you design an approved unvented assembly per R806.5.
Practically speaking, many West Side homes qualify for 1:300 because they have a painted or installed vapor barrier behind the drywall. In older homes without that layer, or with lots of can lights and chases, we sometimes size closer to 1:150 and focus on air sealing. It’s not only about numbers: it’s about the whole assembly working together. Local building codes guide these ventilation options.
Fixes, Upgrades, and Maintenance
Clearing blocked soffits and adding baffles
First, we open the airway. We remove bird blocks (or replace with vented ones), vacuum debris, and install rafter baffles from soffit vents up the bay to keep insulation in place. Small job, big impact.
We’ve done this in Queen Anne homes where painters sealed soffit vents years ago, ten minutes with a multi-tool and suddenly the attic breathes. This improves the intake and exhaust in the roof ventilation system.
Improving air sealing and insulation together
We seal around light fixtures, plumbing stacks, top plates, and attic hatches with foam or caulk, then top off insulation to code or better. Pairing air sealing with ventilation is like tightening the jar lid and then storing it in a cool pantry, both matter.
Routing bath and dryer vents outdoors
We still find bath fans and even dryers dumping moisture into the attic. That’s a fast track to mold. Every bath, kitchen, and dryer vent should terminate outdoors with a proper hood and backdraft damper. The Washington State Department of Labor & Industries also emphasizes safe venting and combustion safety in homes. Safety rules and contractor resources are helpful for pros and homeowners alike.
Keeping out pests and wind-driven rain
Good vent products include insect screens and baffling. In stormy spots, West Seattle’s bluff roads come to mind. We choose ridge vents with external baffles and add underlayments designed to resist wind-driven rain.
Working safely on a roof
We don’t want anyone to get hurt. Use fall protection, stable ladders, and don’t step on brittle sheathing. If you’re unsure, call a pro. Safety is key when installing new roof vents or turbine vent.
Choosing a Qualified Roofer in Washington
Questions to ask any contractor and red flags
- How will you balance intake and exhaust, and what NFVA are you targeting?
- Will you add baffles at every bay over soffit vents?
- How will you handle bath and kitchen exhaust terminations?
- Do you check for combustion appliances that could backdraft if we add powered vents?
Red flags: a contractor who says “vents don’t really matter,” or suggests mixing multiple exhaust types without a reason. Also, no permit when one is required.
Permits, warranty, and inspection tips
In many Washington jurisdictions, ventilation work done during a re-roof falls under the same building permit as the roof. Ask about workmanship and manufacturer warranties, some shingle warranties require proper ventilation. After installation, we like homeowners to take a quick attic look on a cool morning. No condensation on nails, insulation not blocking soffit vents, and daylight visible through vent paths, that’s a good sign. Ensure everything is installed correctly.
What to expect during a ventilation upgrade
Most upgrades take a day or two, depending on access. We protect landscaping, cut in roof vents, install baffles, adjust insulation, and clean up. It’s noisy for a bit, but not dramatic. And you should notice the difference: cooler upstairs in summer, fewer musty smells in the shoulder seasons, and a roof system that simply feels calmer.
If you want to see where we work, from Seattle, Bellevue, and Redmond to Tacoma and up the I‑5 corridor, check out our service areas. We cover the wider Puget Sound region, and yes, we’ve fixed some gnarly attic situations after those big Pineapple Express rains.
Conclusion
Roof ventilation sounds technical, but the idea is simple: let fresh air in low, let warm air or hot air out high, and keep the path open. In Washington’s damp winters and warming summers, that balance protects shingles, controls moisture, and helps your home feel comfortable without running the HVAC ragged.
We’re fans of straightforward solutions, soffit vents intake, ridge vents exhaust, proper baffles, and careful air sealing. And we tailor the plan to the roof’s design you have: standard attic, vaulted, or low-slope. If you’ve noticed musty smells, hot upstairs rooms, or frost in the attic space, you’re not imagining it. Those are your clues.
If you want us to take a look, we’re here. NearMe Roofing Company serves homeowners across the Puget Sound. We’ll check the math, peek in the attic space, mind the details, and leave the roof breathing the way it should. Honestly, that’s the goal: a quiet, boring attic and a roof that just lasts.
Roof Ventilation FAQs
What is roof ventilation and how does it work?
Roof ventilation is the movement of air through your attic space so fresh air enters low (soffit vents) and warm air, moist exhaust exits high (ridge vents). Using the stack effect where hot air rises, steady airflow removes heat and humidity, helping prevent mold, protecting shingles, stabilizing indoor temperatures, and improving overall roof system health. Roof ventilation systems incorporate various roof vents for intake and exhaust.
Why is roof ventilation important in Washington’s climate?
Washington’s long wet seasons and warmer summers drive moisture and heat into attics. Proper roof ventilation dries the roof decking after damp spells, reduces condensation, and eases summer heat load. In colder east-side areas, balanced airflow also helps minimize ice dams and prevent ice dams by keeping the roof deck temperature closer to outdoor conditions. This enhances energy efficiency and reduces energy costs.
How much roof ventilation do I need?
A common guideline is 1 square foot of net free area per 300 square feet of attic floor (1:300) when a proper interior vapor barrier exists; otherwise, 1:150. Split intake vents and exhaust vents roughly 50/50, slightly favoring intake vents. Always use the vent material’s NFVA ratings—screens and louvers reduce free area. Consider local building codes for your area.
Which roof ventilation types work best—ridge, gable, or powered vents?
For most pitched roofs, continuous soffit vents intake plus a ridge vent provides even, low‑energy airflow. Gable vents and box vents can work but risk short‑circuiting if mixed without a plan. Powered vents move lots of air but can depressurize attics without adequate intake or air sealing, and require combustion‑safety checks. Types of roof vents include turbine vents, power vents, and passive ventilation options like box vent and gable vent.
Do ridge vents leak in heavy rain or wind?
Quality ridge vents with external baffles and weather filters, installed to manufacturer specs with proper underlayment, resist wind‑driven rain. Leaks usually trace to poor ventilation, inadequate intake vents, or debris clogging. In storm‑exposed sites, choose tested, baffled products and pair with robust underlayments for added protection. When wind hits, the system’s design allows air to flow without issues, creating a cross breeze if needed.
How often should I inspect or clean attic vents?
Check soffit vents and ridge vents at least twice a year—spring and fall—and after major storms or wildfire smoke events. Clear debris, nests, and paint buildup; confirm rafter baffles keep insulation out of the air path; and verify bath and dryer ducts terminate outdoors. Prompt maintenance preserves airflow and performance. This keeps the roof ventilation system allowing air to flow efficiently, preventing wood rot and maintaining the roof line integrity.