Roof sheathing thickness is crucial for structural integrity, supporting roofing materials, and resisting wind/snow loads. It ensures a stable and durable roof. The thickness of your roof is more than just a personal preference. It affects everything from your home’s structural strength to its resistance to moisture. Residential homes usually use ½-inch or ⅝-inch sheathing thickness, but some roofing materials require more. For example, if metal roofs don’t have a sheathing of at least ¾ inches, the roof will sag between the rafters.
But that’s not all! Many other factors determine your roof’s ideal sheathing thickness, from climate conditions to local building codes. In this blog, we’ll break it all down for you so that you know everything you need to know about sheathing thickness.
Why Roof Sheathing Thickness Matters
Let’s look at a few reasons why the thickness of your sheathing matters more than you think.
Structural Integrity
Your roof’s sheathing must be strong enough to hold the weight of the roofing materials as well as any additional loads, such as rain and snow. This is especially pertinent in areas with high rainfall, such as Seattle. That’s why Washington State building codes usually require a minimum sheathing thickness of ⅝ inches for wooden sheathing panels so that they can handle the stress imposed by the weather as well as the weight of the roofing material. The thickness of the sheathing also helps distribute the roof’s load more evenly, prevents sagging, and offers impact resistance.
Moisture Resistance
With over 150 days of rainfall each year, Seattle roofs must be designed for moisture resistance. Thicker sheathing acts as a more robust barrier against water penetration and also resists rot and mold better. Moisture-resistant material like high-quality plywood is often preferred in this climate.
Fastener Hold
Roofing materials are attached to the sheathing with fasteners and nails. Thicker sheathing allows them to be secured more firmly, which reduces the chances of them being pulled out during high winds and storms. Here’s how to use the right nails in the right place:
- Use 8d galvanized common nails (0.131 x 2-1/2 inches) for sheathing up to ⅝ inch thick
- Maintain nail spacing of 6 inches along the edges and 12 inches elsewhere
Long-Term Durability
Thicker sheathing, while it may not seem as cost-effective initially, is more long-lasting and reduces the need for frequent repairs or early replacement. In areas like Seattle, where temperature fluctuations and humidity can cause warping and delamination or weaken the structural integrity of the roof, a thicker sheathing is more important.
Energy Efficiency
While other factors, such as roofing materials, play a bigger part in energy efficiency, thicker sheathing (combined with proper ventilation) also contributes to insulation and improves the heating and cooling efficiency of the house. This helps lower your electricity bills.
What Determines the Thickness of the Roof Sheathing?
The sheathing thickness isn’t decided arbitrarily. There are several interrelated factors that decide what thickness would be ideal for your roof.
The Roof’s Structure
Structural engineers look at three key factors when determining sheathing thickness:
- How far apart are the rafters?
- How is weight distributed on the roof?
- How much can the sheathing safely bend?
When the rafters or trusses are spaced farther apart (approximately 24 inches OC), the sheathing needs to be thicker so that it can bridge the gaps without sagging. Conversely, if the spacing is closer (approximately 16 inches OC), a thinner panel could work.
Complex roof designs might require an expert opinion to get the thickness calculations right. And you may also need H-clips, which act as additional support between panels.
*OC = on center (the spacing between rafters or trusses)
Sheathing Material Type
Plywood and oriented strand board (OSB) are the two most common materials used for roof sheathing, and each responds differently under different conditions. CDX plywood, in particular, is preferred for its moisture resistance and durability. OSB, on the other hand, is more cost-effective and offers comparable support to plywood when used at the right thickness. Interestingly, homes built in the 1980s often used ⅜ inch plywood, which is too thin by today’s standards.
Weight of the Roofing Material
Different roofing materials put different kinds of stress on the roof’s deck. Lighter materials generally need less support than heavier materials like clay tiles, and additional loads on the roof, such as snow or ice, should also be factored in. This is why it’s important to choose the right kind of sheathing thickness.
Sheathing comes in various thicknesses, and the most common materials used are plywood and OSB. Let’s take a look at the most common thicknesses and their applications below.
| Sheathing Thickness | Common Materials | Typical Applications | Key Advantages | Limitations |
| 3/8 inch | Plywood, OSB | Very light-load roofs; closely spaced rafters (16” OC or less) | Lightweight; lower material cost | Limited strength; not recommended for heavy loads |
| 1/2 inch | Plywood (CDX), OSB | Standard residential roofs with moderate loads and 16”–24” OC spacing | Good balance between cost and strength; versatile | May show slight deflection on wider spans or under extreme loads |
| 5/8 inch | Plywood, OSB | Roofs in areas with heavy rain, high winds, or wider rafter spacing (24” OC+) | Enhanced structural support; improved moisture resistance | Heavier; higher cost; may require more labor |
| 3/4 inch | Plywood, OSB (less common) | Commercial roofs or structures with very wide rafter spacing | Superior load-bearing capacity; very rigid | Expensive; significantly heavier; harder to handle |
We usually recommend Seattle homeowners to get a sheathing that’s ⅝ inches thick. However, for less demanding roofs, a ½ inch sheathing might be sufficient, provided that it complies with local building codes.
Local Building Codes
Local building codes outline minimum requirements for roof sheathing thickness. For example, according to WAC 246-359-310, wooden roof sheathing must be a minimum of ⅝ inch thick. And adhering to these codes is non-negotiable, as non-compliance can lead to safety hazards, penalties, and expensive rebuilds.
Environmental Conditions
Seattle is well-known for its rain. And while building codes set the basic requirements, nature is the real test.
Snow Country
Snow is nature’s weight test for your roof. In northern regions (zones 6/7) where the snow can pack a serious punch, builders take no risks and install sheathing that’s ⅝ inches thick, regardless of the roofing material.
And when snow loads exceed 80 psf (pounds per square foot), standard ½ inch plywood won’t do. That’s why smart contractors use 19/32 inch plywood with a 40/20 span rating. This extra thickness helps distribute weight more evenly across the roof.
Hurricane and Tornado Zones
Strong winds try to rip the roof right off your home. And in areas prone to hurricanes, even FORTIFIED Home standards require at least 7/16-inch thickness, especially if the rafters are placed 24 inches apart.
But thickness isn’t everything, and installation matters too. You’ll need to use special ring-shank nails instead of ordinary fasteners to secure everything in place. These nails act as your roof’s seat belt against strong winds. Fasteners must be penetrated at least ¾ inches into the sheathing to hold the panels firmly in place during high winds.
Pacific Northwest
In the PNW climate, water is your roof’s biggest enemy. In such areas, builders often combine closed-cell spray foam insulation inside with rigid insulation outside to create a moisture barrier for the sheathing. Some experts also recommend vapor-permeable materials like fiberboard for north-facing sections, where moisture tends to accumulate in winter.
Desert Regions
Handling the dramatic temperature swings in desert regions means getting thicker panels of at least a ½ inch that can stand against warping and buckling under extreme heat. Without the proper sheathing thickness and underlayment, many roofs can get extremely hot in direct sunlight, aging faster than normal.
Future Load Considerations
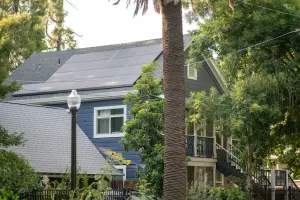
You should also consider the future demands on your roof. For example, do you plan on installing solar panels or other heavy equipment on the roof? If yes, choosing a thicker sheathing now can save you from expensive retrofits down the line.
Signs That Your Sheathing May Need Replacement
Over time, even the best sheathing wears down from exposure to weather, moisture, and natural degradation. Here are some signs to watch out for that tell you that your sheathing might need to be replaced:
- Visible bowing or sagging, which indicates that the roof is no longer providing adequate support
- Water stains or leaks are indicators that the sheathing has been compromised and water is penetrating inside and causing water damage
- Mold, mildew, and rot indicate trapped water
- Delamination or warping of the sheathing occurs when temperature or humidity levels fluctuate
For all these tell-tale signs, it’s important to promptly call in a professional roofing contractor to inspect the roof and suggest repairs.
How Different Roof Structures Affect Sheathing Thickness
Your roof’s design also dictates how thick the sheathing should be. Different roof types require different thicknesses to maintain their structural integrity over time.
Truss Systems vs. Traditional Rafters
Trusses and traditional rafters speak completely different languages when it comes to sheathing thickness.
- 24-inch spaced trusses require at least ⅝ inch sheathing to prevent sagging
- 16-inch spaced prefabricated trusses work well with ½ inch sheathing
Flat vs. Pitched Roofs
Flat roofs need special attention because water doesn’t drain easily from them. They require membrane systems instead of standard shingles.
- Pitched roofs (4:12 slope or greater) naturally shed water better, allowing for more sheathing options
- Flat roofs require thicker sheathing and specialized waterproofing to prevent leaks
Cost Considerations
Admittedly, replacing or installing new roof sheathing is a significant investment. But would you rather pay more now or deal with expensive repairs later for a roof that didn’t even last you 10 years?
Thicker sheathing that’s at least ½ inch thick does a better job of preventing warping and sagging, especially in regions with extreme temperature fluctuations.
The cost of sheathing depends on the material and thickness. For example, high-quality plywood costs between $0.50 and $1.25 per square foot in material costs. Labor cost, on the other hand, depends on the complexity of the roof and the local labor rates which typically add an additional $1.50 to $3.00 per square foot.
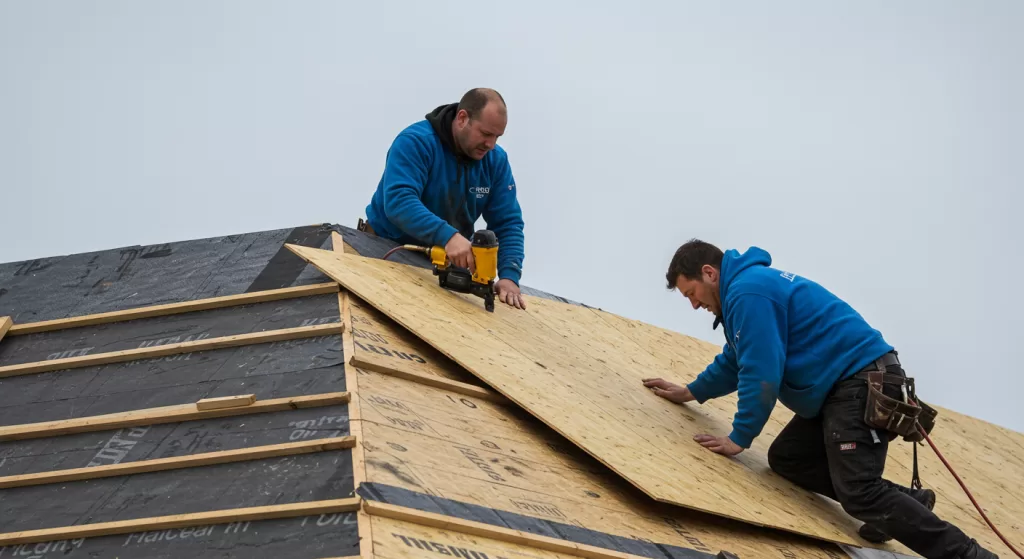
Installation Tips
For the best roof sheathing installation, keep the following tips in mind:
- Stagger panel seams as it helps distribute loads more evenly across the roof.
- Leaving ⅛ inch expansion gaps, especially for wood-based panels that expand and contract with temperature and humidity changes, can prevent buckling.
- In areas with wider rafter spacing, installing H-clips between panels can provide additional edge support.
- Ensure that the roof’s structural framing is level and free of defects before installing the sheathing, as misalignment can compromise the entire roof system.
- Given Seattle’s unique climate and building code requirements, consulting with local roofing contractors who understand regional nuances is invaluable.
Conclusion
If you haven’t had your roof and sheathing inspected for a while, it’s time to call in the experts at NearMe Roofing Company.
We’ve been serving the areas in Seattle and the Greater Puget Sound for years, and we know what your roof needs in our local climate. So schedule your free roof inspection with us today!